Showing posts with label table. Show all posts

Monday, December 14, 2009

Plasma Cutting Table

Plasma Cutting Table

Maintaining my blistering pace of a posting every month or so, here is another project write-up along the metal working lines. I recently bought a Gianttech plasma cutter from the good people at http://www.plasmametalcutter.com (which I will post about shortly). It became obvious pretty quickly that just cutting things on the edge of the welding table wouldn't work very well - and risked damaging my beautiful 3/16 steel top for the welding table. So, the answer was to build a simple plasma cutting table.

At it's most basic, a plasma cutting table is just a set of steel slats turned on their end that conduct electricity to the workpiece, but won't interfere with the cutting action because of their thin profile. I decided that the most reasonable design was to go for 1 1/5" slats of 1/8" thick mild steel. I also figured that the grating part of the table would take a lot of abuse from cutting so it would be good to make it so it could be easily turned over and eventually replaced. The basic idea then was to build the grate as one unit, then have it be able to be set onto the base frame to make the completed table. The base frame is made from good ol' 1 1/2" x 1/8" angle iron. The table surface area is 2' x 2'.


The first parts that I made (which I didn't take pictures of) were two angle iron squares. One makes up the top frame and the other is the cross brace for the legs.

Here is the construction process for the grate - I just used corner clamps to keep adding in more and more slats. They are positioned just slightly over 1 1/2" apart so they space out evenly:


When it was done - and with a bit of grinding and fitting - the grate fit perfectly into the top frame:


Here are the grate, squares and legs waiting for assembly:


...and here is the completed unit:


Ah, the astute observer will notice, why isn't the grate nestled neatly in the top frame the way it was designed? Because i managed to weld it together upside down! Arrgghh! Another lesson that WELDING IS PERMANENT! Double check everything before reaching for the welding gun. However, I was able to weld some extra angle iron onto the top frame to hold the grate. So, it ends up being an inch or so higher than I might have liked, but otherwise is very usable and the top is still easily replaceable:


It's all stores up nice and compact and when I need to work, I can just swing the welder and cutter out on their trolley.

Thursday, November 5, 2009

Welding Table Construction

In honour of Monty Python's 40th Anniversary... And now for something completely different!

I believe way back in the original start of the blog, I explained that I also did a lot of machining including designing & building steam engines a few years ago. I had always meant to take a welding course, and on a whim I decided to finally do that this fall. So, the last few Saturdays I have been struggling out of bed at 6:30 AM to get into to weld with a huge stick welder (Shielded Metal Arc Welding - SWAM) process. Naturally, I have gotten totally obsessed and decided to get a welder for myself!

Originally, I wanted to get a 240 VAC stick welder, but my friendly neighborhood electrician told me the garage wiring just wasn't up to it, and this is hardly something I want to do inside the house! After some research, I settled on a Lincoln Electric MIG-Pak 140 unit which runs off of regular 120 VAC (similar to this) that does Metal Inert Gas arc welding (aka GMAW - Gas-shielded Metal Arc Welding). Fortuitously, it went on a good sale and I picked up a bottle of C02/Argon shielding gas, a leather welders coat and an auto-darkening welding helmet and I was set!

The technique and setup for the MIG welding is quite different from the big Hobart industrial units I am using in class, but MIG welding is pretty easy to at least pick up the basics of. The good thing with getting used to using the big welder in class is it gives you a very healthy respect for all the safety precautions and you get all the good theory on how everything is supposed to work and the various types of welds as well as the good advice of an experienced instructor.

So, after fooling around with my welder to get a feel for how it performs with various thicknesses of metal and so on, I decided the first traditional project for a starting welder is to build a metal welding table. I need the extra surface space in the shop and I definitely need a metal surface table for arc welding.

Step 1 - I worked up a design to get the rough dimensions and the shopping list for the metal store:


This used 1 1/2 inch square tubing for the legs, 1 1/2 angle iron for the frame and 3/16 thick sheet for the table top.

Step 2 - I bought the table top already cut to size and then cut down the frame and leg pieces from the ten foot lengths I bought. Here are the parts laid out before welding:


Step 2 - First I welded the frame that supports the top. The parts were cut mitered and then I put them on some firebricks on the top itself - on the assumption that the top is more level that the old floor of my garage!


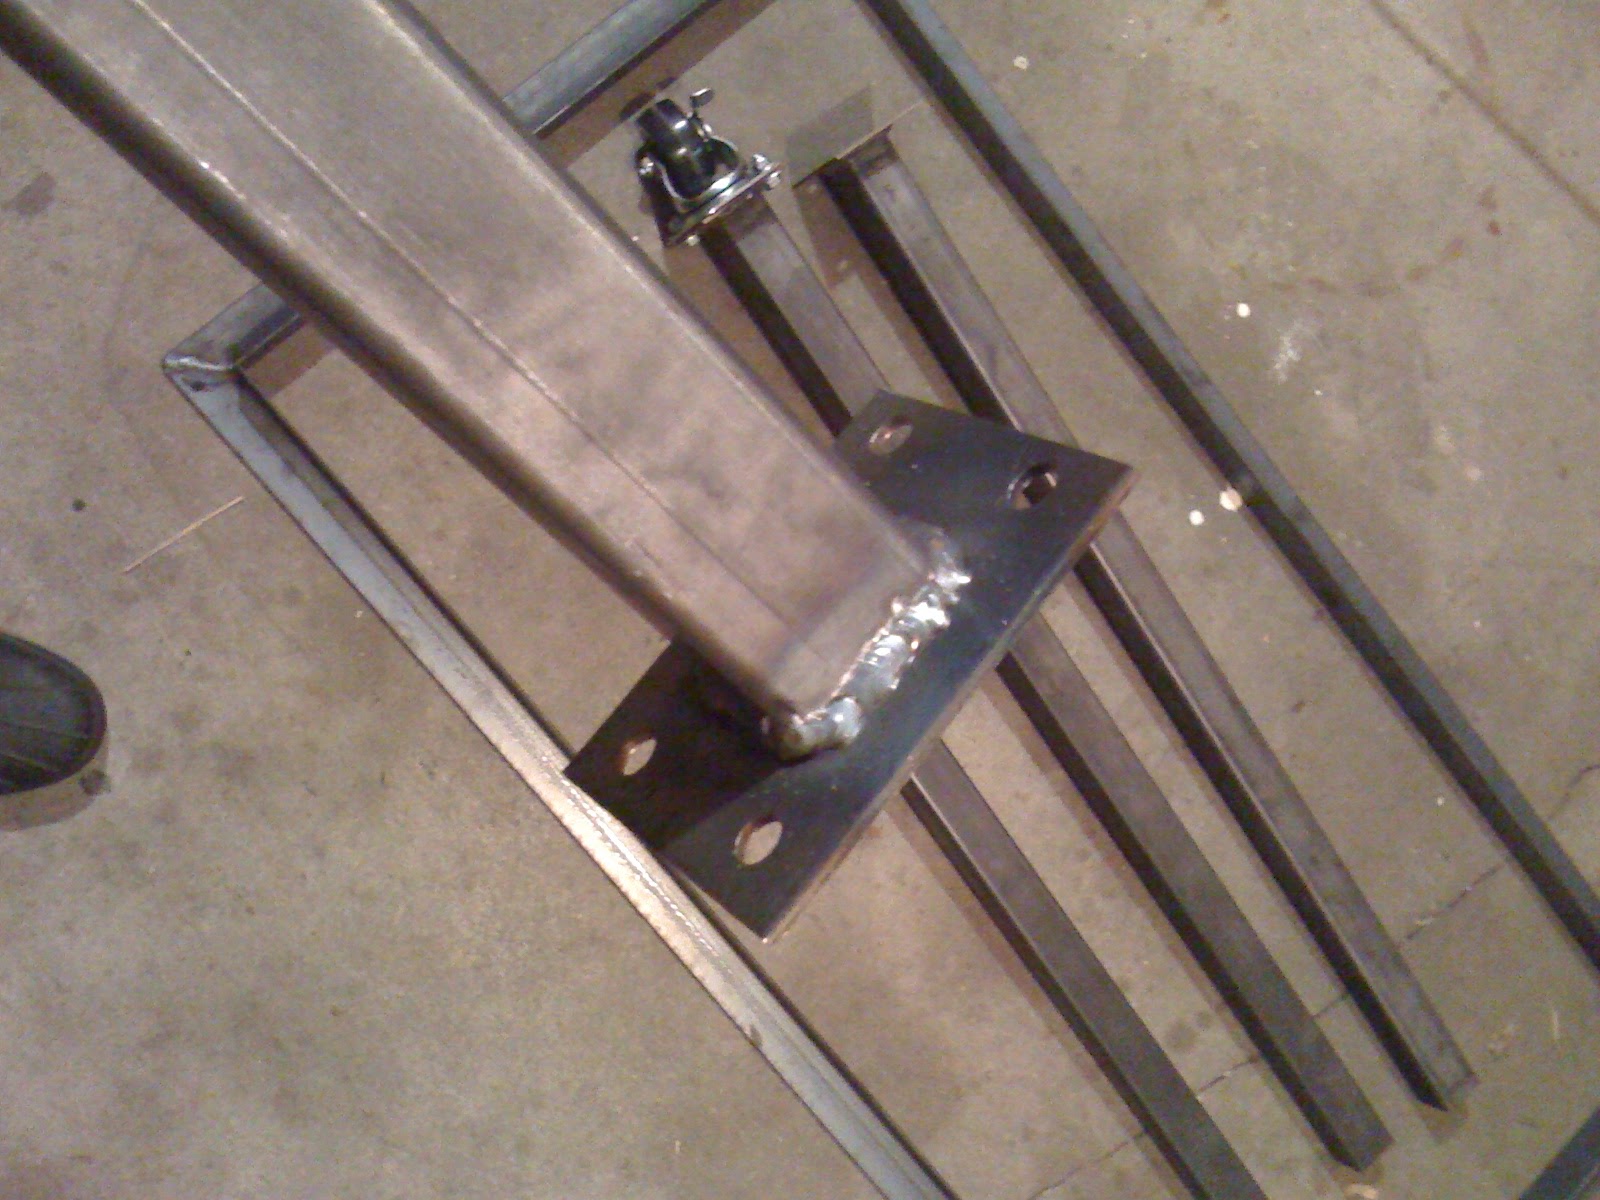
Step 3 - With the top frame done, then I welded the plates for the caster wheels to the bottom of the legs:


Not too bad MIG welds considering I am just starting out!


Step 4 - I welded the leg assemblies to the frame assemblies. I wish I had captured the proper way of lining up the legs perfectly perpendicular to the frame! I actually messed up the first leg and it went on slightly out of true, but the other three legs went on perfectly. You will see later that it's not too bad and the one leg being slightly out won't be too big an impact. Once the legs are welded onto the frame, I needed to grind down the welds on the top of the frame so it would mate properly to the table top:


Step 5 - The frame and leg assembly was welded to the top. Here I use an intermittent rather than a continuous weld:


Step 6 - Roll it out of the shop and paint it! The slats are 1 1/2 inch wide 1/8 thick strapping I added to make a shelf for storing stock and other bits & pieces. Can you tell which leg is slightly out of alignment?


Here it is with good double coat of primer:


Finally, it got a good heavy coat of Tremclad basic green glossy paint so it looks like a tractor!


A nice substantial first welding project and something very useful for the shop! Next up will be a cart to put the welder on and my new plasma cutter which I should get next week.

Some day, I will combine the Arduino, welding and maching stuff into one project, promise!